Unity Texture Importing
A tool that allows you to optimize your texture import settings easily.
Unity import settings for assets are critical when concerned with size, loading times, and performance. Having the wrong import settings for each asset can be devastating - especially when dealing with textures and graphics. Luckily, the Pley SDK has a built-in tool to help you optimize how you import textures.
What is the Texture Import Settings Applier?
It is a tool that allows you to set specific import settings to the textures inside your project that match a certain rule which helps reduce build sizes and load times. Using this tool you can configure rules that can be applied automatically or manually to entire folders if need be.
Normally it can take endless hours to go through and adjust each texture asset individually. Simply, the Texture Import Settings Applier uses filter rules to automate this process for you.
Using the Texture Import Settings Applier tool
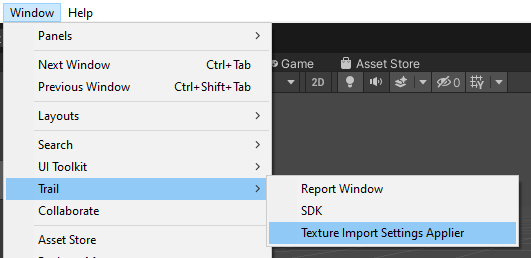
The Pley menu in Unity
1) Once you've imported the SDK you can find the tool in Window > Pley.
2) Click on the Texture Import Settings Applier option to open the tool.
3) Click on the Create Texture Import Settings Applier; this creates an asset in the Pley SDK folder that will contain all your different rules.
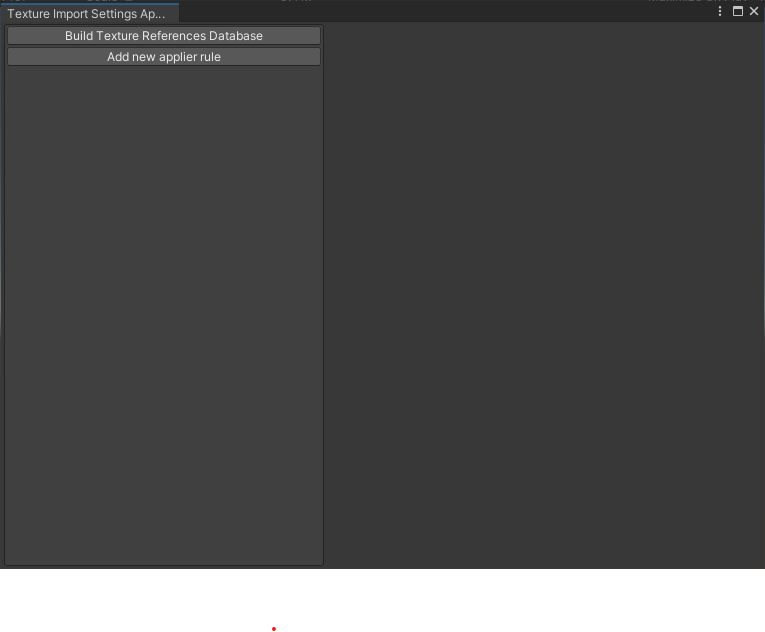
After creating an applier, you'll get offered to build the database or add a rule to your applier.
4) The next step is to create a rule to apply to your textures. Click on the Add new applier rule:
5) Now that a new rule is created, you can now modify the import settings in a single location (instead of hunting for each texture file individually). You should be familiar with most of these settings -- they are Unity's import settings. However, under "Advanced" there is a new option that allows you to scale your source assets which in turn enables you to use Crunch Compression on textures.
6) The final option that is not part of Unity's default import settings is the "Regular Expression Patterns" section. This allows you to pick specific assets only in your projects to apply the rule to.
7) After you've set all the options as you see fit, you'll need to click on Apply. In case source files will be modified you will receive a message similar to the below:
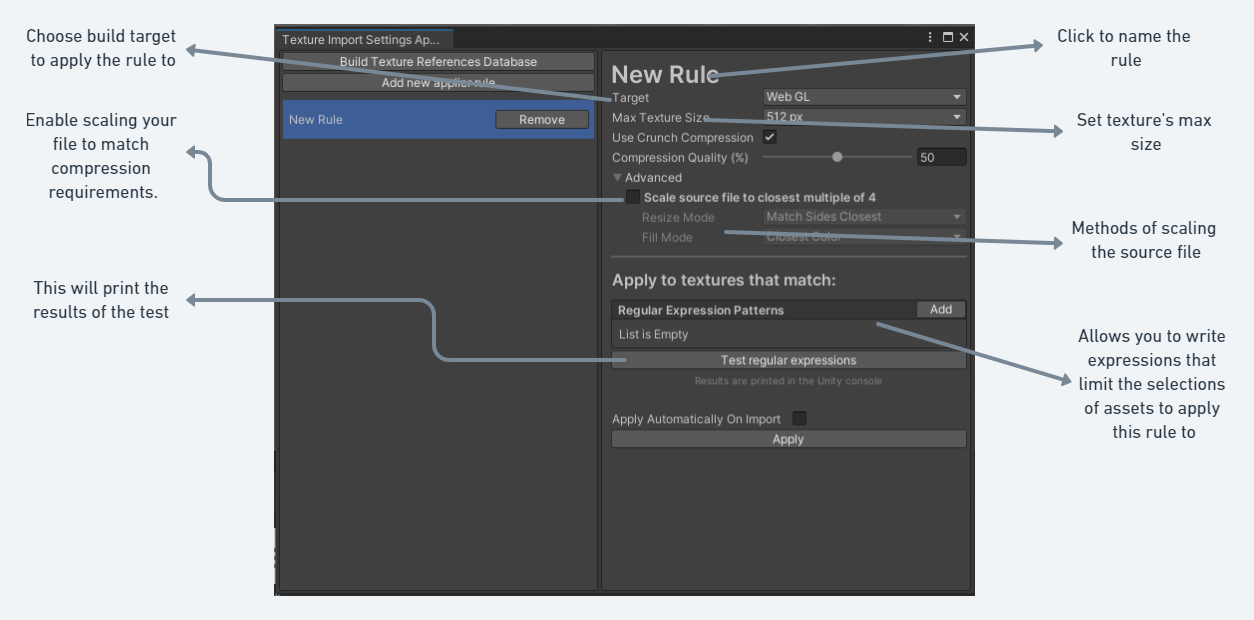
A new rule created.
The Test regular expressions button will print the result of your entered expression to help you debug and confirm the expression. Below you can find an example of a regular expression that limits the rule to only assets within the "Assets/Sprites" folder.
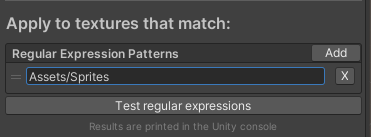
An example of an expression to limit the assets the rule can apply to.
Scale source file to closest multiple of 4This option modifies the source files (assets) directly and normally would break all references to the affected asset. The way the Texture Import Settings Applier tool modifies the asset is by modifying it from Single to Multiple, This forces Unity to "technically" create a new copy of the source file which in turn breaks all references to the asset. To avoid this from happening you must click on "Build Texture References Database" before you apply your rules that use this option.
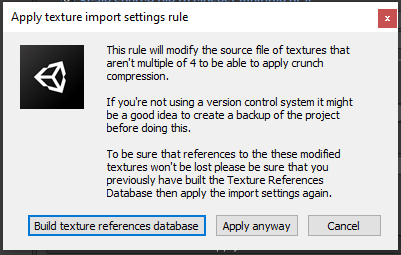
Warning to let you know that references may break and you need to build the database references before accepting.
If you haven't built the texture references database, it is recommended you do so now. If you did that already, then you can click Apply anyway and this rule will be applied immediately to your projects. Depending on the number of assets that you have and the rule's expression, this may take a few minutes.
Example: Import Rule
Here is an example asset before the rule was applied:
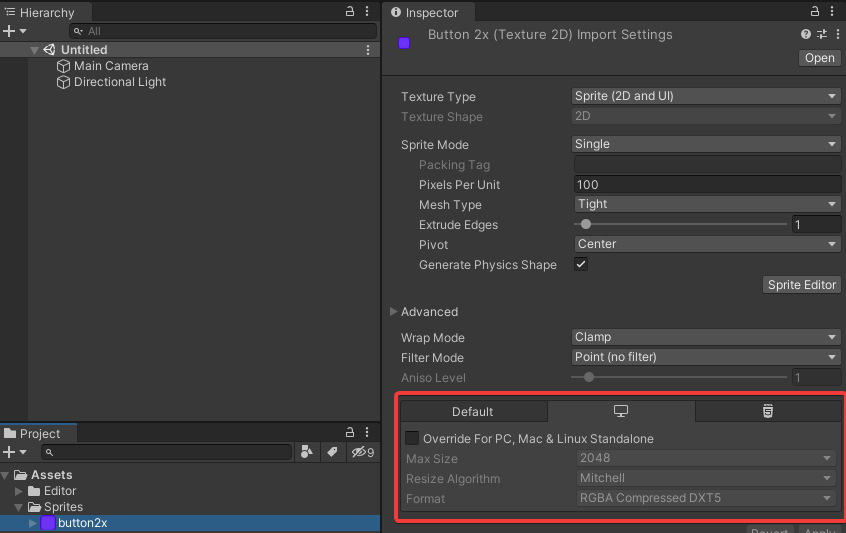
Before.
Here is the same asset after the rule was applied:
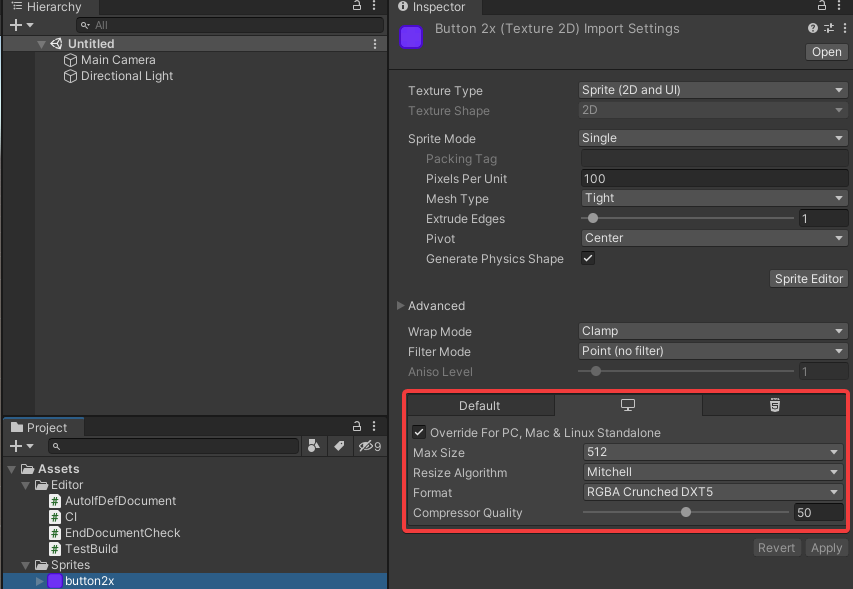
After.
You now have an automated implementation of texture settings. Normally, this process is tedious and long. Using Pley's Settings Applier, you can use rules to save both time and effort!
Updated 5 months ago
